FL STUDIO BASICS
FL Studio User Interfaces
This section covers the main control interfaces in FL Studio. A ![]() video tutorials are also available on the Image-Line YouTube page.
video tutorials are also available on the Image-Line YouTube page.
Controls & Interfaces
This section contains notes about the interface controls of FL Studio. Hold the mouse pointer over everything and look at the Hint Bar while you do. Different icons will explain what actions are possible with that icon.

NOTE: Windows will snap together when they are dragged close to each other. Override this behavior by holding the Alt key while dragging.
Hint Panel

The Hint Panel shows help & tips for items as you move the mouse cursor over them. In the screen shot above 'Mix level' shows the object the mouse pointer is currently over, and the icons to the right what actions are possible. There is an optional, larger, floating Hint panel revealed by the View > Toolbars > Hint bar setting. There is no better way to discover features in FL Studio.
Knobs & sliders
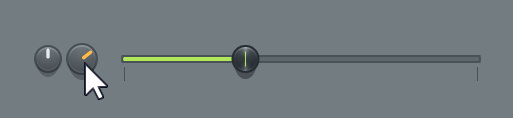
- Common Features - All knobs (wheels) and sliders in FL Studio behave similarly. To change the value of a knob or slider Left-click the image and drag up/down (left/right for horizontal sliders). You can also type a numerical value by Right-clicking on top of the knob/slider and selecting 'Type in value' from the menu. 'Set' option in the Right-click menu opens a larger control for more accurate adjusting.
- Values - Knob, slider and other control values are expressed in percentages (0% to 100%), decimal values (0-1) and context aware values (i.e. dB when adjusting volume). When typing in values, you can select the unit of measurement from two categories:
- Context Aware - Value expressed as units used with that specific control.
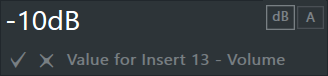
- Normalized - Value expressed as decimal between 0-1, or a percentage.
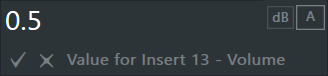
NOTE: If a context aware unit is not available for the control, only percentage/decimal is used.
- Context Aware - Value expressed as units used with that specific control.
- Fine Adjustments - To fine-tune the value of a control, hold the CTRL key while dragging OR hold down both mouse buttons and drag on the control.
- Snapping - Some controls (knobs and sliders) may pause at default and other useful places while you tweak them. If you want to avoid that behavior, hold down the SHIFT key while using a control.
- Quick Reset - Holding ALT and Left-clicking a control resets it to its default value OR if you have a three button mouse (the scroll-wheel is often a button, press it and see if it clicks...'clicks', not cracks!), you can quickly reset any knob or slider to the default value by clicking on the middle mouse button as opposed to the standard right-mouse click and selecting 'reset' from the menu.
- Automation - Most knobs and sliders can be linked to external controllers OR internal controllers. Right-Click the knob or control you want to automate and move a knob on your physical controller or select a link option from the menu.
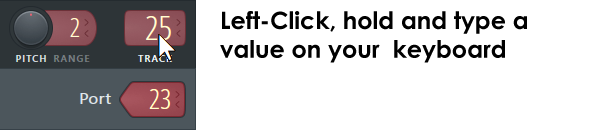
Number Displays
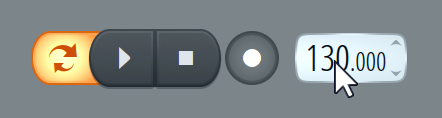
The value of the LCD control is normally set by dragging on the screen with your left mouse button up and down (just like a wheel). You can also increment or decrement the LCD value one step at a time: place your mouse pointer at the top edge of the LCD (to increment) or bottom edge (to decrement) the control - the pointer will change to show the increment or decrement cursor respectively (![]() ). Click to increment/decrement the LCD value. You can also Left-Click and hold the control, then type in a numerical value with your typing keyboard.
). Click to increment/decrement the LCD value. You can also Left-Click and hold the control, then type in a numerical value with your typing keyboard.
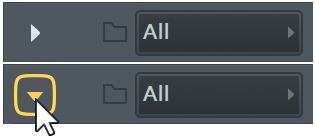
Window menus
|
|
There are menu icons located in the top left corner of the Playlist, Channel Settings, Channel Rack, Piano roll, Mixer and many other places, sometimes they are tiny, so keep your eye out for them. Left-clicking opens the associated menu. |
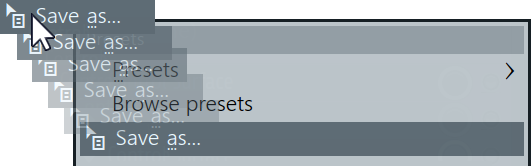
Menu items
|
|
Where you see the save drag icon associated with a Save item, you can click on the icon and drag the file to a compatible location in FL Studio (e.g. another Piano roll, the Browser, etc). NOTE: To disable drag-animation effects set the General Settings > Animations to 'Keep it sober' or 'Don't distract me'. |
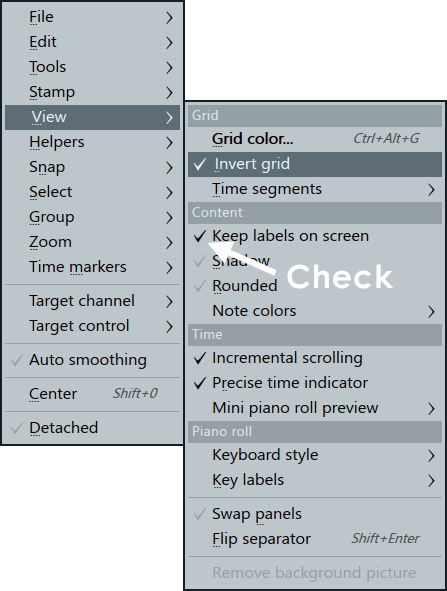
- Check menu items - Check items (tickable) in menus can be Right-Clicked to try them without closing the menu.
Horizontal Scroll-Zoom Bars & Vertical Zoom
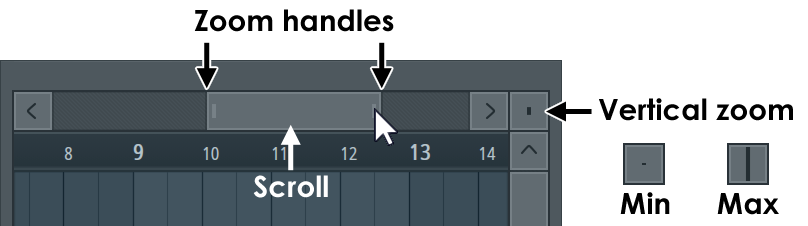
Some Scrollbars (Playlist and Piano roll) have 'two dimensional scrolling' - drag them with your right mouse button (instead of the left, as usual) to move the view simultaneously in the horizontal and vertical directions. NOTE: You can also click the (Middle-Mouse-Button) and drag in the Piano roll, Playlist and Event Editors to scroll vertically and horizontally at the same time.
- The Playlist and Piano roll have zoomable areas. Where vertical zooming is possible you will notice a rectangular box. Click on this with your mouse and move up/down to change the zoom level.
- Zoom resolution depends on the 'Timebase' (PPQ) settings in the General Project Options (F11). The higher the PPQ, the greater the resolution, although you will find the default setting of 96 PPQ to be adequate for most situations.
- Scroll speed will slow when snap settings other than 'Line' are used.
- There's a setting under General Settings > Small scrollbars in editors that will set the width to 50%.
Presets
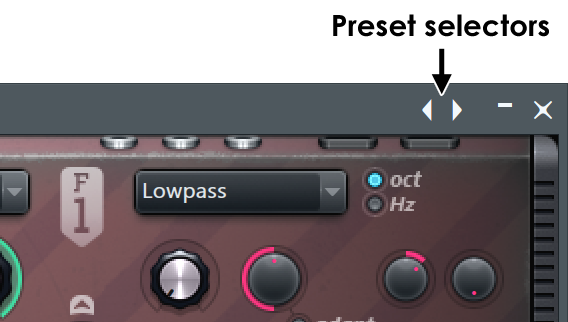
Right-Click on the double arrows in the top right corner of Instrument or FX wrappers to bring up the preset menu. Select a preset from the list to load it. Left-click on the right arrow to step forward and left arrow to step back through the preset list sequentially. NOTE: Not all plugins will display their presets from here, you may need to use the preset selectors built into a plugins user-interface.
Wave displays
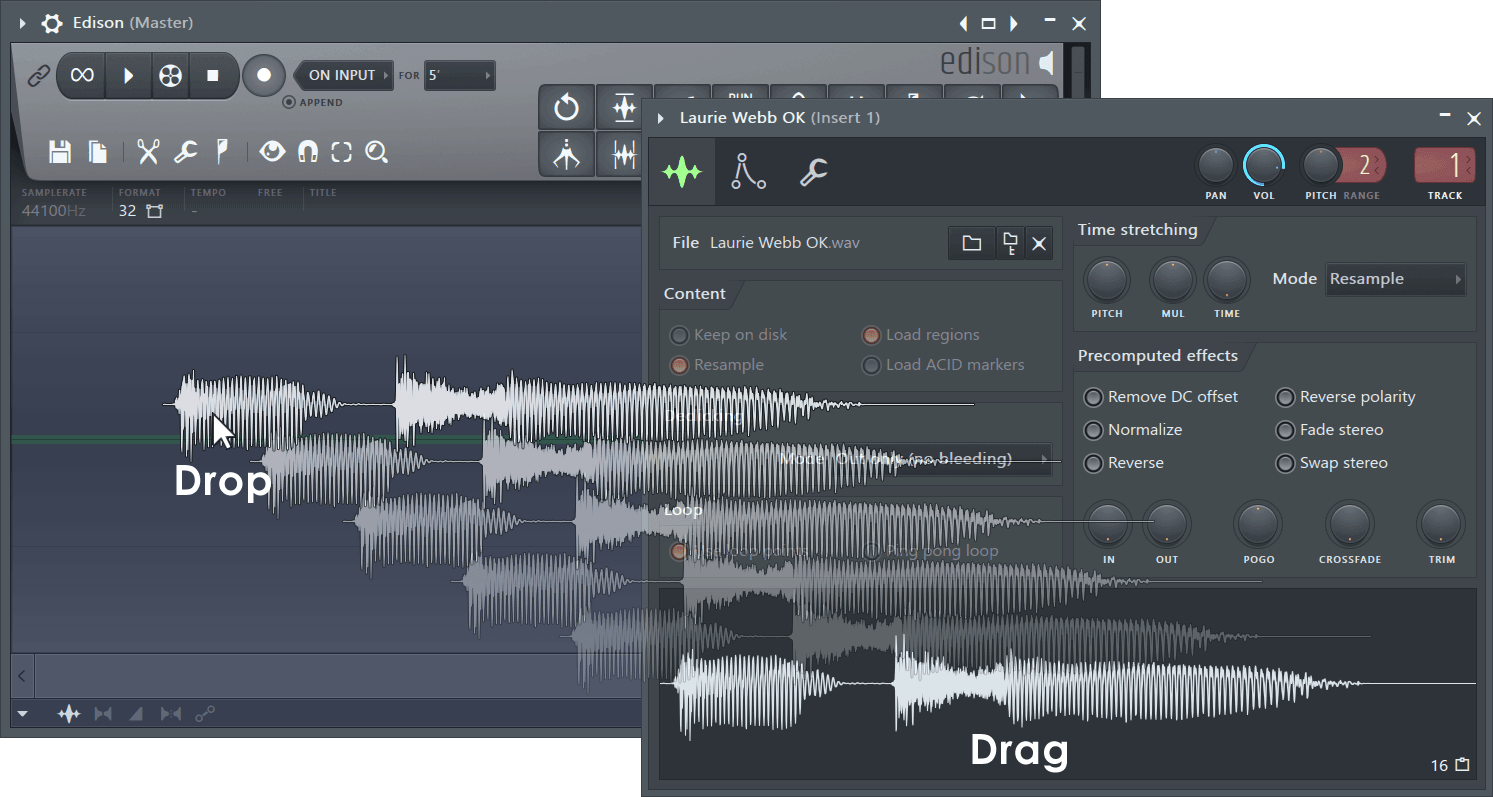
If you see a sample displayed in FL Studio, it can probably be Left-clicked and dragged to another location such as a sampler channel or a another plugin that uses .wav files.
NOTE: To disable drag-animation effects set the General Settings > Animations to 'Keep it sober' or 'Don't distract me'.
Color Selector
There are three modes (Circle, Box and Preset) using the three icons in the upper-left.
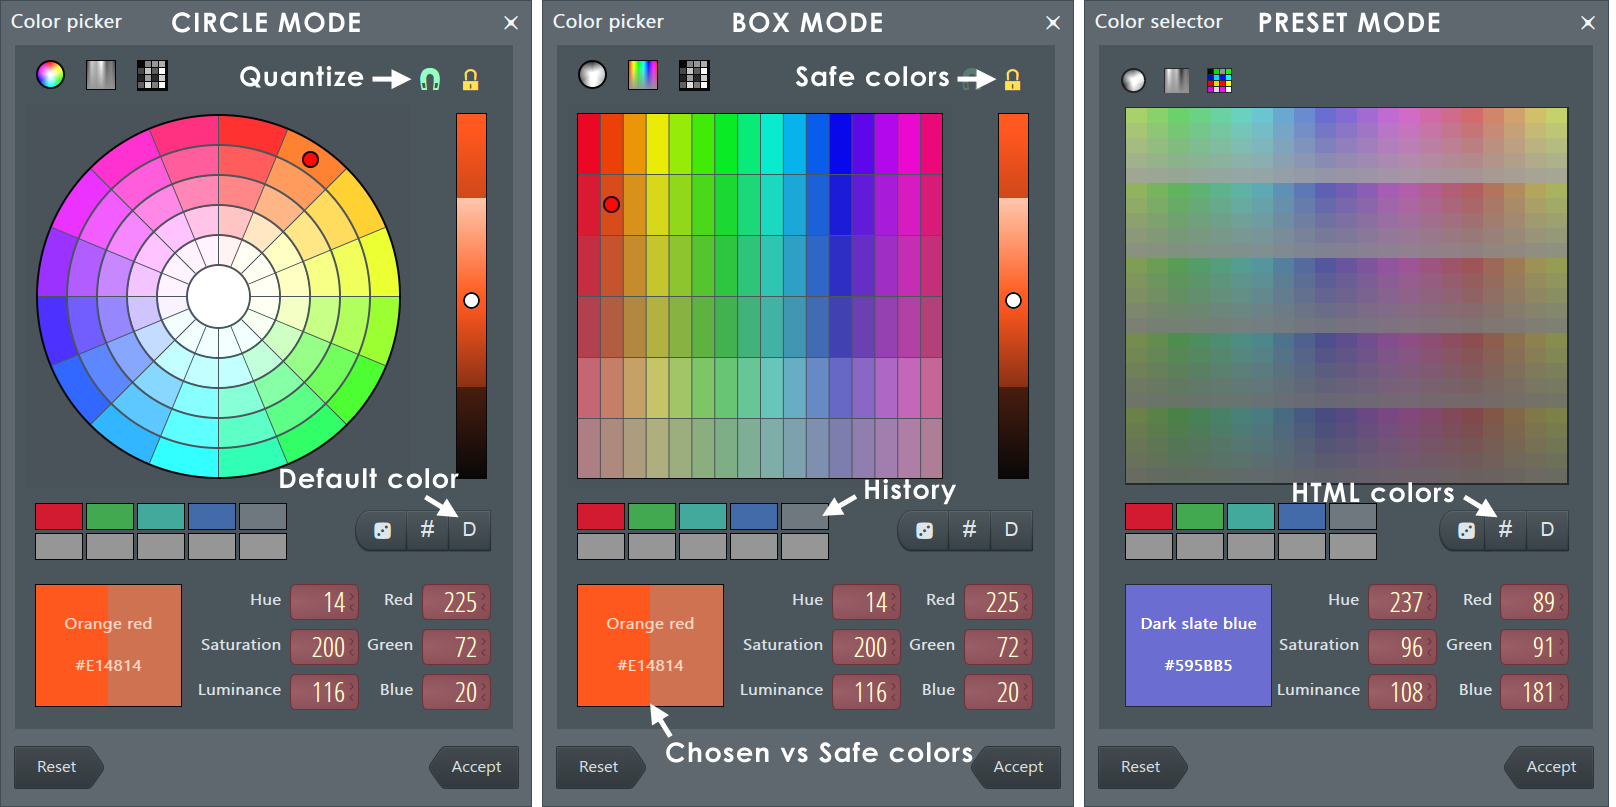
The Color selector panel opens for any interface element allowing you to change color. Choose colors by clicking on the color space in the top-center of the panel.
- Quantized colors - Snaps hue and saturation to quantized values to make selection easier. Deselect the magnet icon (upper right) for full color choice.
- Lock to safe colors - Reduces the saturation and luminance range to fall within the color range chosen by the FL Studio 'aesthetics committee'. Yes, they lead dull lives.
- Custom colors - Click in the color space to choose the Hue and use the slider to choose the Saturation. The chosen and safe version of the color will display in the lower-left patch.
- History - As you Accept colors the history will collect them for re-use (top-left is most recent).
- Random safe color (dice icon) - Selects a random color from the 'safe' pallette.
- HTML color (#) - Enter colors in HTML format.
- Default color (D) - Restores the default color for the interface element you are modifying.
- Hue, Saturation & Luminance (HSL) - Right-click to enter the values in the respective fields.
- Red, Green & Blue (RGB) - Right-click to enter the values in the respective fields.
- Accept - The selected color settings will be applied and the Color Selector closed.
Multimedia Keyboards
![]()
If you have a multimedia keyboard you can use the Play/Pause button to Start/Pause FL Studio, the Stop button will stop FL Studio and return the song position marker to the beginning of the Playlist. The FF/RW buttons will jump between Playlist Time Markers if present.
Text Entry
- Long vs Short Space - Typing a Long Space character use (Alt+Ctrl+Space) and Short Space character use (Alt+Shift+Space).
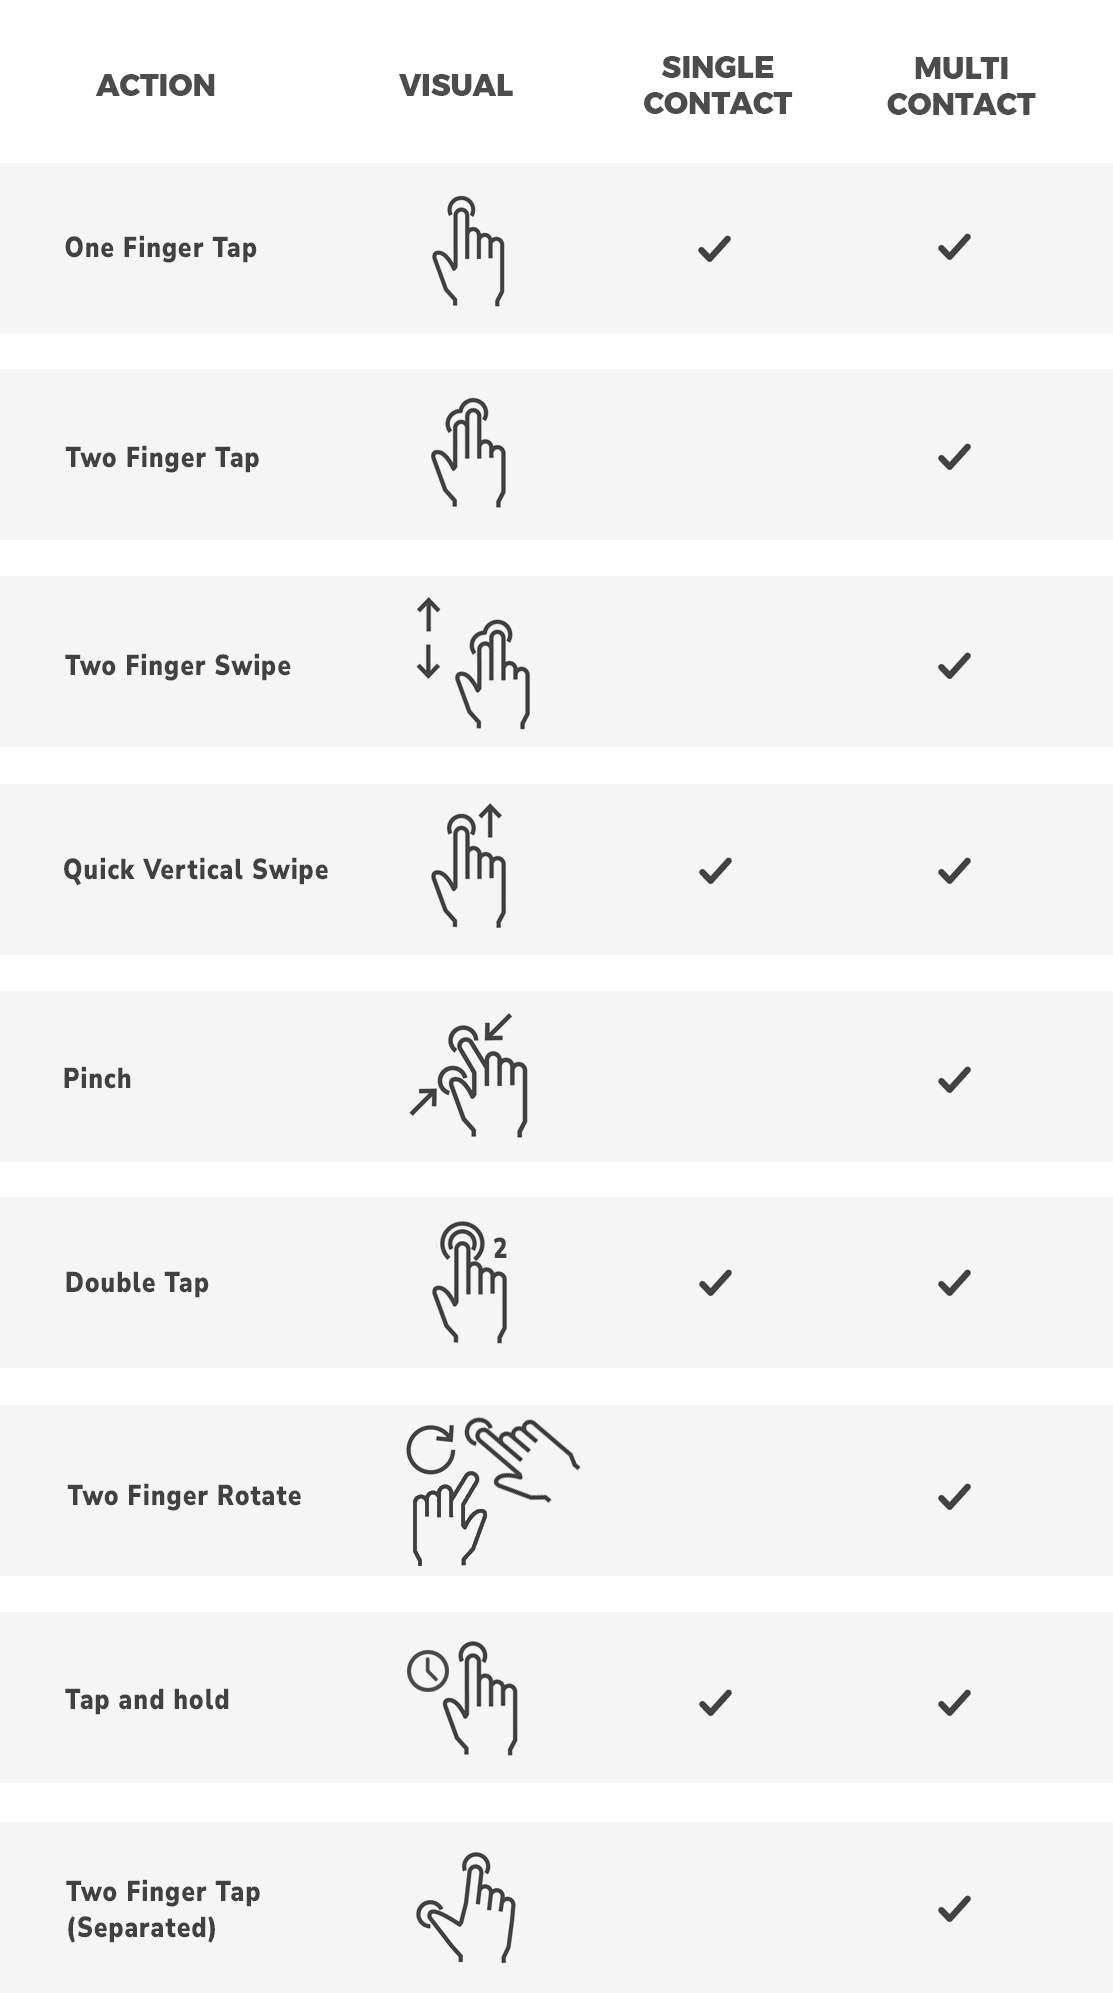
Multi-Touch Support
Select Options > General Settings >Optimize for 'Multi-touch monitor'. Windows Touch enables several gestures that support single and multiple contacts.
Multi-touch control vs Multi-touch gestures:
|
|
Multi-touch control - Where you see this icon it allows you to swap between multi-touch gestures and multi-touch control. Turn OFF to use multi-touch gestures, as shown below. Multi-touch gestures and control are necessarily independent modes since a two finger tap must be distinguished from two fingers touching two controls (such as mixer faders) |
Multi-touch control all windows (Channel Rack, Playlist, Piano roll, Mixer etc.)
- Move/drag window - Two finger tap and drag on the title-bar (fingers together). This will work on crowded title bars also, any tools and menus will be ignored.
- Maximize/restore - Two finger tap on the title-bar.
- Close - Two finger tap with fingers separated.
- Resize - Top left and top-right edges are hot-spots for tap and drag resize operations.
Multi-touch features by window:
- Mixer - With Multi-touch control OFF:
- Scroll tracks - Two finger tap and drag horizontally.
- Select multiple tracks - Two finger tap on tracks.
- Browser - 1-finger vertical swipe scrolling
- Step seq - 1-button mode is selected on the Options > General settings. 2-finger swipes for vertical scrolling
- Piano roll/Playlist - Use the following actions
- Add a note - Double-tap.
- Scroll - 2-finger swipe. You can release one finger after the scrolling starts.
- Select region - Define a rectangle by tapp-&-holding the Bottom-Left point FIRST and the Top-Right point second.
- Vertical zoom - Two-finger rotate around point
- Zoom out full - 2-finger tap.
- Zoom to selection - Define a rectangle by tapp-&-holding the Top-Right point FIRST and the Bottom-Left point second.
- Zoom - Pinch.
- Playlist in Performance Mode - Low-level multi-touch enabled, so that you can trigger multiple clips together. We can't prevent Windows from relocating the cursor in this low-level mode.
- Retrigger with snap disabled - Two finger tap on Clip.
- Trigger group - Quick vertical swipe (requires 'click & hold' switched on in the General settings).
- X/Y aftertouch control - After touching a clip, move around to tweak the Playlist track's own X/Y control. To assign - Select the Multi-link controllers switch, tweak one or two target controls, then tap on a clip on the target track (only one X/Y control per track is available).
- Stop track - Tap Track header (name area).
The following image illustrates touch gestures used in FL Studio.
Favorite folders
All open/import and save/export dialogs in FL Studio have a Favorites function to quickly jump to frequently used folders.
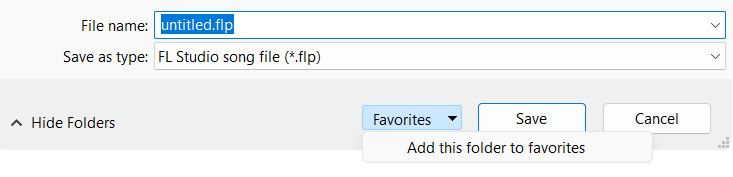
- Favorites menu - Contains a list with shortcuts to all favorite folders you have set.
- Add this folder to favorites - Adds the current folder to the favorites. Browse to the folder you want to add as an item in the Favorites menu and click this option.
- Remove this folder from favorites - Removes the currently displayed folder from the favorites list.
Multi-Screen Support
FL Studio allows the use of two (or more) monitors. In the configuration below the screen lower-front is a multi-touch control monitor. Normally you would resize FL Studio component windows (Rack, Playlist, Piano roll etc) to fit inside each monitor.
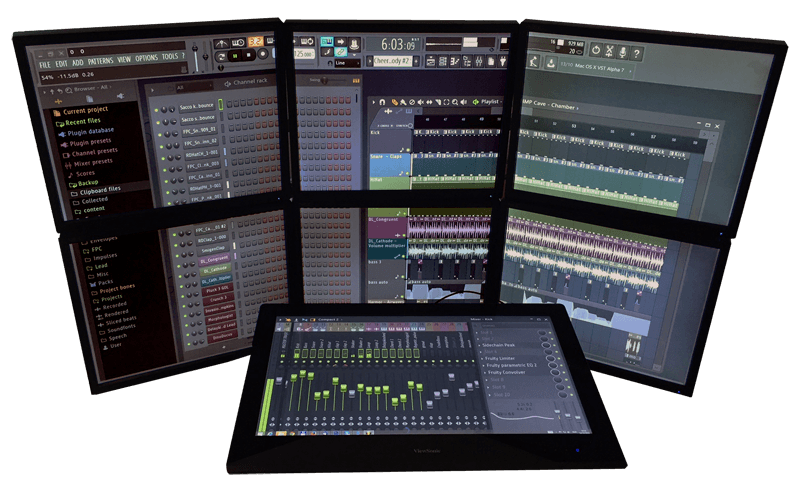
To use multiple monitors there are 2 options as shown in this video:
- Detached windows - From the window menu (top left corner, Piano roll, Playlist, Event editor, Plugin e.t.c,) set to 'Detached'.
- Expand the desktop - Right-Click the close button [X] and select 'Maximize to all monitors' OR click the 'Maximize/Restore' button (between the minimize & close button) and stretch the work area over the multiple monitors.